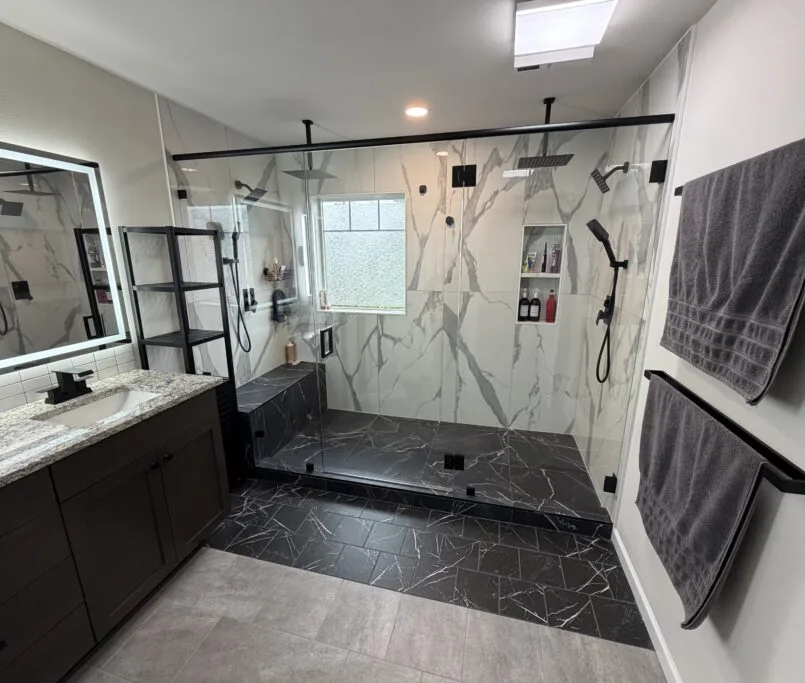
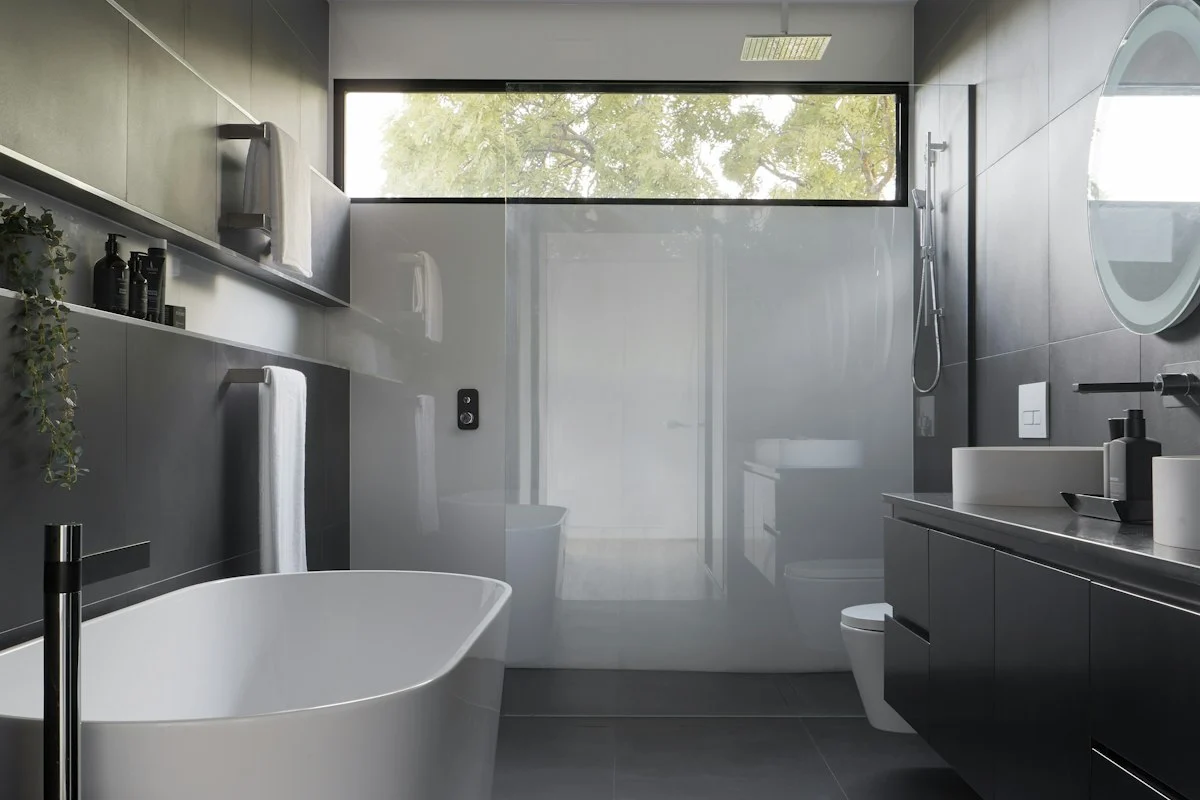
Bellevue Primary Bathroom Remodeling: Build the Scope Before Selecting Finishes
If your goal is a smooth, on-schedule primary bath renovation in Bellevue WA, start by building the scope before selecting finishes. Decide on layout, plumbing changes, waterproofing approach, lighting, ventilation, storage, and finish details first—these choices define your contractor’s scope of work and the job’s sequencing. In short, bellevue primary bathroom remodel planning is about clear decisions up front so pricing is accurate, ordering stays on track, and the installation team knows exactly what to build.
Set goals and constraints before you touch finishes
Every successful primary bathroom starts with a simple plan: what stays, what moves, and what must improve. Make a short list of problems to solve (poor lighting, lack of storage, hard-to-clean shower, limited counter space) and pair it with non-negotiables (keep the window, reuse the vanity, add a linen cabinet, create a walk-in shower). This defines scope and helps your remodel team suggest solutions without guesswork.
Next, note any constraints that affect the build and sequencing. Examples include ceiling height, existing plumbing locations, joist direction under the bathroom, and wall depths available for in-wall valves or niches. The earlier you identify these, the more precise your scope of work will be.
Layout decisions drive scope and sequencing
Layout is the foundation of your scope. Even small changes can ripple through plumbing, electrical, framing, and tile work. Decide these items before quotes are finalized.
Keep fixtures in place, or move them?
- Keeping fixtures in place typically limits the work to replacement and finish upgrades. Sequencing is more straightforward: demolition, rough-ins as needed, waterproofing, tile, and trim-out.
- Moving a toilet, tub, or shower adds tasks: selective demolition, subfloor or wall framing modifications, rerouting supply and drain lines, patching, and substrate preparation. That means more rough-in coordination and a longer critical path before finishes begin.
- Altering the vanity location or adding a second sink impacts the plumbing rough-in, cabinet sizing, countertop fabrication, and electrical for lighting and outlets.
Wet-area type: tub-shower combo, walk-in shower, or curbless
- Tub-shower combos generally use a standard drain location and surround, which can simplify waterproofing and tile layout.
- Walk-in showers require a sloped pan and continuous waterproofing up the walls and across benches and niches. Drain type (center vs. linear) affects floor framing, slope, and tile pattern.
- Curbless showers introduce precise slope and transitions at the bathroom floor, and they often require more substrate planning. That affects when waterproofing and tile can begin, and it can add steps to the prep sequence.
Clearances, door swings, and universal comfort
- Door locations and swing direction influence vanity placement and shower glass layout.
- Shower glass needs planned clearances for hinges and panels; these are templated after tile, so exact framing matters early.
- Built-in benches, niches, and grab-bar blocking should be set during framing to avoid surprises later.
Plumbing plan: what your installer must know before rough-in
Your plumbing plan is more than fixture brands. It’s a set of precise locations and depths that allow rough-in work to proceed cleanly and on time.
Valves, supplies, and wall depth
- Valve type (pressure-balance vs. thermostatic) and trim style determine wall depth, blocking, and exact valve height. Confirm these before walls are closed.
- Hand showers, body sprays, and rain heads add extra outlets, diverters, and mounting requirements. Their locations and hose reach should be marked on the plan.
- Freestanding tub fillers affect floor plumbing and require sturdy anchoring; that detail changes the framing and sequencing of the tub area.
Drain, slope, and venting considerations
- Linear vs. center drain changes slope geometry and tile layout. Linear drains near the wall often pair best with large-format floor tile; center drains allow more symmetrical slopes.
- Shower pan build should be coordinated with the chosen waterproofing system so the drain assembly matches the membrane or foam pan.
- Access and cleanouts should be planned so serviceable parts are reachable after the bathroom is complete.
Fixture choices that impact rough-in
- One sink or two? A second sink means additional supply and drain routing, cabinet sizing, and countertop cutouts.
- Toilet type (floor-mount vs. wall-hung) changes carrier support and drain routing. Confirm rough-in dimensions early.
- Heated towel bars or bidet seats may require dedicated wiring or outlets near plumbing—coordinate between trades in your scope.
Waterproofing details define durability
Waterproofing is a system, not a product. The method you choose drives the installation sequence, inspection points, and finish choices. Decide on your approach before demolition begins so the contractor can price materials and schedule time for proper prep, cure, and flood testing as applicable.
Shower pan and wall systems
- Sheet membranes, liquid-applied membranes, or foam panels each have specific installation steps and compatible drains. Your scope should name the method so everyone bids the same system.
- Backer board vs. foam panels changes labor and drying times. It also affects how niches and benches are built and waterproofed.
Niches, benches, and transitions
- Niches need solid framing and full membrane coverage, including edges and shelves, to prevent leaks at grout lines.
- Benches must be pitched to shed water and fully wrapped by the waterproofing system.
- Floor transitions at the shower entry and bathroom doorway should be planned to minimize tripping hazards and to protect edges from moisture.
Pro tip: Put the exact waterproofing method, compatible drain assembly, and quality control steps (like pan checks or water-hold tests where appropriate) into your written scope. This is one of the biggest quality drivers in any primary bath.
Electrical, lighting, and controls: layer the light, plan the power
Well-planned lighting and power make a primary bathroom feel larger, cleaner, and safer. These choices set your electrician’s scope and the drywall schedule.
Lighting layers
- Task lighting at mirrors (sconces or backlit mirrors) reduces shadows on the face. Their mounting height controls rough wiring and blocking.
- Ambient lighting (overhead recessed fixtures or surface mounts) sets overall brightness and must be coordinated with the fan location and shower glass.
- Accent lighting (toe-kick LEDs, niche lights) requires low-voltage drivers and dedicated switching. Plan transformer locations before walls close.
Switching, outlets, and comfort features
- Grouped switching and dimmers create flexible light levels for mornings and evenings.
- Outlet placement should serve vanity tools, charging, and accessories. Discuss any required safety protection with your electrician during planning.
- Heated floors need a thermostat location and dedicated power; this affects tile sequencing and floor buildup thickness.
Ventilation that actually clears humidity
A quiet, properly sized fan helps protect paint, drywall, and framing over time. Ventilation details affect excavation in the ceiling, roof or wall terminations, and the drywall schedule.
- Fan size and noise should match room volume and desired comfort. A humidity-sensing control can reduce fogging and moisture buildup.
- Duct routing should be short, smooth, and terminate outdoors to move moist air efficiently. Coordinate routing with lighting to avoid conflicts above the ceiling.
- Shower steam management may call for a door that reaches the ceiling, an upgraded fan, or both. Decide these early so glass and framing align.
Storage and function: a place for everything
Functional storage prevents countertop clutter and reduces daily stress. Storage decisions influence framing, electrical, and cabinetmaking in your scope.
Vanities and towers
- Vanity configuration (drawers vs. doors) dictates plumbing offsets and outlet locations inside cabinets.
- Tall linen towers add vertical storage but may affect lighting symmetry and mirror size. Confirm clearances at doors and pathways.
- Recessed medicine cabinets require wall cavity depth and planned wiring if they are lighted or heated.
In-shower storage
- Built-in niches need precise tile module planning to avoid awkward cuts and to align grout joints.
- Shelves and ledges can be stone or porcelain; each changes weight, fabrication, and adhesive choices.
Finish selections that support the scope
Finishes look great when they’re chosen with installation in mind. Tile size, slab thickness, and glass style all influence labor steps and lead times.
Tile strategy
- Large-format tile often requires flatter substrates and tighter tolerances; include wall prep and floor leveling in the scope if needed.
- Mosaics and patterns may add layout time and require additional setting materials. Note these details in the proposal so labor is right-sized.
- Grout type and color affect maintenance and appearance. Selecting a grout system up front avoids last-minute substitutions.
Countertops, glass, and hardware
- Countertops need final cabinet sizes and sink choices to template accurately. Build this into the schedule, including fabrication time.
- Shower glass is measured after tile is complete and installed after fabrication. Knowing this helps plan the final stages of the project.
- Hardware finishes (faucets, pulls, shower trim, accessories) should be coordinated so the look is cohesive and so rough-in parts match the finish kits.
Build a written scope of work your contractor can price
Translate decisions into a line-by-line scope so every bidder is pricing the same job. This prevents change orders caused by assumptions and keeps the team aligned.
- Demolition and protection: note dust control, surface protection, and disposal plan.
- Framing and substrate prep: backing, blocking, benches, niches, level floors, and plumb walls.
- Plumbing rough-in: valve types, locations, drain style, and any fixture moves.
- Electrical rough-in: fixture count and types, switching plan, outlet locations, and any low-voltage drivers.
- Ventilation: fan model, controls, and duct routing.
- Waterproofing system: method and compatible components.
- Tile work: patterns, edge trims, grout type, and movement joints.
- Cabinetry and tops: vanity specs, tower details, and counter materials.
- Glass: door and panel configuration, hardware finish, and installation sequence.
- Finish carpentry and paint: trim details, mirrors, and touch-ups.
- Clean-up and punch list: final cleaning expectations and completion criteria.
Selections, allowances, and clear inclusions
- Selections finalized up front make ordering and scheduling predictable.
- Allowances should be realistic and tied to specific categories (tile, plumbing fixtures, lighting) so you can track spending.
- Inclusions and exclusions reduce ambiguity—spell out exactly what is and isn’t part of the price.
Timeline drivers in a primary bathroom
Even with a solid plan, certain steps control how quickly the project can advance. Understanding them helps keep expectations aligned.
- Lead times: custom vanities, specialty fixtures, and glass often require ordering well before demolition. Early decisions keep the critical path clear.
- Prep and cure times: floor leveling, waterproofing, and tile setting need proper drying before the next trade begins.
- Template-to-install windows: countertops and shower glass are measured from finished surfaces, so they naturally come late in the sequence.
- Scope changes: new ideas midstream can reset sequencing. Capture any changes in writing and re-evaluate the schedule.
Budgeting factors to decide early
While every home is different, certain choices predictably add complexity and drive labor:
- Moving plumbing or converting tubs to large walk-in or curbless showers increases prep and rough-in time.
- Custom tile layouts (mosaics, miters, large-format on walls) require more substrate prep and setting time.
- Heated floors and integrated lighting features add trades and coordination.
- Custom cabinetry and stone typically carry longer lead times and extra site coordination.
How to compare contractor proposals—apples to apples
Clear scopes help you compare bids fairly. Ask for details that show methods and materials, not just line items:
- Waterproofing method and brand, compatible drain assembly, and whether critical checks are included.
- Tile installation approach, substrate prep steps, and grout type.
- Plumbing valve models and trim, drain style, and fixture counts.
- Lighting and fan specifications, switching plan, and controls.
- Cabinet construction details, finish type, hardware, and soft-close features as specified.
- Glass thickness and hardware finish to match your design intent.
- Site protection and daily cleanup expectations spelled out.
When to bring in a professional design-build mindset
If your remodel includes a new shower footprint, curbless conversion, or a full lighting and storage rework, experienced coordination is essential. A local team familiar with sequencing and product lead times can help you finalize the plan, order correctly, and build to the scope without backtracking. For additional considerations specific to the area, see this focused overview: Bathroom Remodeling in Bellevue WA: What Homeowners Should Know.
Want to see how thoughtful planning translates in practice? Explore this Bellevue basement bathroom remodel for ideas about space planning, material coordination, and sequencing.
Ready to define your scope and lock in selections? Reach out to our local remodeling team to discuss your priorities and timeline: contact us.
A practical sequencing checklist for your primary bath
- Define goals and constraints: layout, storage, lighting, and ventilation needs.
- Select systems: waterproofing method, drain style, fan and lighting plan.
- Finalize fixtures and finishes: valves, trim, tile, grout, vanity, top, glass style, hardware.
- Draft the scope of work: inclusions, exclusions, and allowances; dust control and clean-up plan.
- Order long-lead items: cabinetry, special-order fixtures, and custom components.
- Set the schedule: trade sequencing, cure times, and template/installation windows.
- Demolition and protection: isolate work areas and protect paths.
- Framing and substrate prep: blocking, benches, niches, and floor/wall corrections.
- Plumbing and electrical rough-in: confirm valve heights, outlet locations, and switching.
- Ventilation and insulation as needed: complete fan routing and air sealing where applicable.
- Waterproofing: install the selected system per manufacturer instructions.
- Tile installation: set floors and walls, grout, and protect surfaces.
- Cabinet and top: set vanity, template, and install counter after fabrication.
- Glass measurement and install: template from finished tile; install after fabrication.
- Trim-out: plumbing fixtures, lighting, hardware, mirrors, accessories.
- Final paint, clean, and punch list: detail clean and address small items.
FAQ: Bellevue primary bathroom scope and sequencing
What decisions should I make before getting contractor bids?
Decide on layout (what moves and what stays), shower type and drain style, waterproofing method, lighting and ventilation plan, storage elements (vanity, towers, niches), and finishes (tile, grout, countertop, glass, hardware). With these set, bids reflect the real scope, not assumptions. This is the essence of bellevue primary bathroom remodel planning.
In what order should a primary bathroom remodel proceed?
Generally: planning and selections, demolition and protection, framing and substrate prep, plumbing and electrical rough-ins, ventilation, waterproofing, tile, cabinetry and countertop, glass, trim-out, and final paint and punch. Each step builds on the last, so having the scope defined early keeps the sequence smooth.
Do I need to finalize all finishes before demolition?
Yes—finalizing fixtures, tile, grout, vanity, tops, glass style, and hardware before demolition allows accurate pricing, proper rough-in locations, and timely ordering. It also prevents mid-project pauses while waiting for decisions or materials.
What choices most affect waterproofing and durability?
Shower type (curbless vs. curbed), drain style (linear vs. center), bench and niche locations, and the chosen waterproofing system. Align these early so the pan, walls, and transitions are built as a coordinated system, not pieced together.
With a clear scope, consistent selections, and a build sequence tailored to your home, bellevue primary bathroom remodel planning turns from guesswork into a predictable, satisfying process—one decision at a time.
Planning a Bellevue Remodeling Project?
Discuss your goals, scope, and next steps with our local remodeling team.