Aging-in-Place Bathroom Remodeling in Renton: Plan for Safety Without Sacrificing Design
If you’re planning an aging in place bathroom remodel Renton WA homeowners can rely on, the key is to blend safety, comfort, and style without making the room feel clinical. Start with a clear scope focused on a curbless shower, generous clearances, excellent lighting, secure reinforcement in walls, slip-resistant finishes, and storage that’s easy to reach. Done thoughtfully, these elements look beautiful now and support changing needs over time.
What “aging-in-place” really means in a bathroom
Aging-in-place design creates a bathroom that works the way you live today and adapts gracefully for tomorrow. Rather than bolting on medical-looking parts later, you plan the space so everyday movements—entering the shower, using the vanity, reaching storage, and moving through the room—stay comfortable and secure. That approach preserves a calm, modern look while quietly building in support where it matters.
- Subtle safety: Hidden wall reinforcement for future grab bars, low thresholds, and slip-resistant floors.
- Effortless use: Lever handles, brighter task lighting, and well-placed outlets and switches.
- Flexible layout: Room to move, with circulation that works whether you’re carrying a laundry basket or using a shower bench.
For more on scope and materials beyond accessibility, explore our overview of bathroom remodeling in Renton.
Start with layout, openings, and clearances
A thoughtful layout is the foundation of a safe and comfortable bathroom. Even small adjustments to door swings, vanity depth, or fixture placement can dramatically improve daily use.
Entry door and thresholds
- Wider, smoother entry: A wider door and a flush transition reduce tripping hazards and make it easy to bring in a rolling hamper or a mobility aid.
- Pocket doors or outswing doors: These free up floor space and reduce interference with the vanity or toilet area.
Circulation paths
- Keep key zones clear: Maintain comfortable space in front of the vanity, toilet, and shower so two people can move if needed.
- Plan for a helper: If assistance may be needed in the future, prioritize extra room beside the toilet and within the shower.
Smart fixture placement
- Vanity depth and edges: A slightly shallower vanity or rounded edges can increase clearance without sacrificing storage.
- Toilet location: Position the toilet so there’s space beside it for a side grab bar now or later.
Curbless, walk-in showers that look custom—not clinical
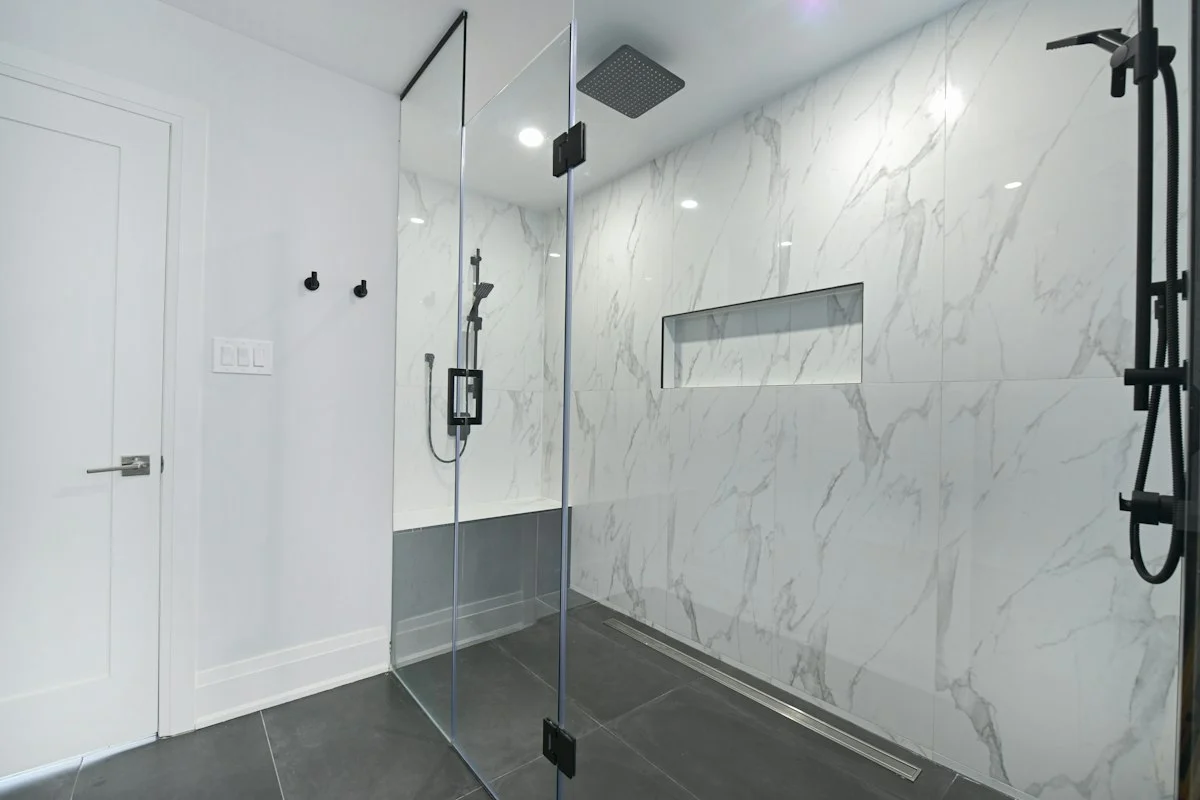
A curbless shower is often the centerpiece of an aging-in-place bathroom remodel in Renton WA. When installed correctly, it blends seamlessly into the bathroom floor, keeps water confined to the shower area, and looks like a boutique spa feature rather than a retrofit.
Drainage and waterproofing
- Subfloor planning: Creating a curbless entry typically involves recessing or carefully feathering the shower floor to guide water to the drain.
- Continuous waterproofing: Use a complete shower system so the pan, walls, and seams all tie together reliably.
- Linear drains: A linear drain at the shower entrance or wall can simplify slope and allows larger tile outside the drain zone.
Benches, niches, and glass
- Integrated bench: A built-in bench (or a sturdy fold-down seat) makes showering easier and offers a comfortable spot for shaving or rinsing.
- Handheld + thermostatic control: A handheld spray on a slide bar and a steady-temperature valve make controls easy and comfortable for all users.
- Frameless glass panels: Fixed glass keeps the space visually open. Ensure the opening is wide enough for easy entry even if a shower door is used.
Pro tip: If you love large-format tile, consider using smaller mosaic tile inside the shower footprint for added traction and a smooth slope to the drain.
Slip resistance underfoot—everyday comfort you can feel
Traction is one of the biggest factors in bathroom safety. Make it part of the design from the start, not an afterthought.
- Tile with texture: Choose floor tile with a subtle texture. Mosaics create more grout lines, which can improve grip, especially in the shower pan.
- Consistent surfaces: Minimize level changes and avoid glossy tiles on the floor. Reserve smoother finishes for walls.
- Rugs and mats: If you use bath mats, choose ones with secure, non-slip backings and place them away from the primary walking path.
Reinforcement: build in strength now, add hardware later
Reinforcement lets you maintain a clean, modern look while keeping your options open. You can install stylish grab bars now—or add them later—without tearing open finished walls.
Blocking in the right places
- Shower walls: Add solid backing wherever a grab bar or seat may be installed—especially near the entrance, bench, and controls.
- By the toilet: Plan for horizontal and vertical bar options to assist with both sitting and standing.
- At the tub (if keeping one): Reinforce for future bars at the tub rim and back wall.
Hardware that blends with your style
- Towel-bar lookalikes: Some grab bars mimic designer towel bars and robe hooks, keeping the aesthetic cohesive.
- Mix heights and angles: Vertical bars help with entering the shower, while angled or horizontal bars support standing and balance.
Lighting: brighter, balanced, and glare-free
Good lighting reduces eye strain, makes grooming easier, and lowers the risk of missteps. Layer it for comfort and clarity:
- Ambient: Even overhead light that avoids harsh shadows.
- Task: Sconces or mirrors with integrated lighting placed at face level for shaving or makeup.
- Accent and night lighting: Soft toe-kick or indirect lighting provides safe nighttime navigation.
Simple controls matter too. Rocker switches, motion-activated night lights, and dimmers make it easy to tailor light levels without fumbling.
Controls, plumbing fixtures, and comfort features
- Lever handles and single-lever faucets: Easier to operate with wet or soapy hands.
- Thermostatic shower valve: Keeps water temperature steady for a more comfortable shower experience.
- Handheld spray on a slide bar: Flexible for seated or standing use and helpful for cleaning the shower.
- Comfort-height toilet and soft-close seat: Easier on the knees and quieter in shared spaces.
- Heated floors: Adds comfort and helps surfaces dry more quickly.
Storage that puts essentials within easy reach
Well-placed storage reduces bending, reaching, and clutter—key for everyday ease.
- Drawer-based vanities: Full-extension drawers bring items forward, so you see and reach everything easily.
- Pull-outs and organizers: Add pull-out shelves for hair tools or cleaning supplies and dividers for small items.
- In-shower niches: Keep soap and bottles at comfortable heights, with a second shelf near the bench if you plan to sit.
- Recessed medicine cabinets: Mirrored storage at face level reduces the need to reach into deep wall cabinets elsewhere.
Ventilation and moisture management
Moisture is the enemy of long-term durability and indoor comfort. Quiet, efficient ventilation paired with thorough waterproofing keeps the bathroom fresh and reduces maintenance.
- Right-size fan: Choose a quiet fan with enough power for the room size; humidity sensing is a helpful hands-off feature.
- Continuous waterproofing in wet zones: Use a proven waterproofing system in the shower and any adjacent floor area, especially with curbless designs.
- Simple cleaning: Consider glass with protective coatings and grout with high-performance sealers for easier upkeep.
Finishes that age gracefully
Materials should be slip-resistant where you stand, easy to clean where water hits, and durable everywhere.
- Flooring: Porcelain tile with texture or fine mosaics for grip. Coordinate shower and main floor for a seamless look.
- Walls: Large-format tile or panels reduce grout lines and maintenance.
- Countertops: Durable, low-porosity tops (like quartz) simplify day-to-day cleanup.
- Metals and finishes: Stick to one or two finishes for a calm design. Matte and brushed finishes hide water spots better than high-polish.
Budgeting the right way: scope choices that matter most
Because every home is different, the best budgeting approach is to define scope clearly and invest where it affects daily comfort and long-term reliability. An aging-in-place plan typically emphasizes:
- Curbless shower conversion: Subfloor work, drainage, and waterproofing are critical quality drivers.
- Tile and glass complexity: Layout, tile size, niches, benches, and custom glass affect labor and lead times.
- Electrical and lighting: Adding circuits for brighter, layered lighting, night lights, and heated floors can influence scope.
- Plumbing updates: Relocating drains or supply lines to create a safer, more open layout may be worthwhile.
- Reinforcement and hardware: Blocking is inexpensive during framing and pays off later by avoiding invasive wall work.
When comparing proposals, look for apples-to-apples details: waterproofing system brand or method, exact tile sizes and layouts, shower door type, placement and quantity of blocking, lighting fixtures and controls, ventilation specs, and all allowances and exclusions. Clear documentation helps you prevent surprises.
Timeline drivers and smart sequencing
Project duration varies with scope and selections, but a few factors commonly drive schedule:
- Lead times: Custom glass, specialty tile, vanities, and fixtures can have long order windows—select early.
- Curbless preparation: Subfloor modifications, sloping, and waterproofing must be precise and are worth the time taken to do them right.
- Tile setting and curing: Complex patterns, mosaics, or large-format tile increase layout and setting time.
- Electrical and ventilation upgrades: Additional circuits or fan upgrades add steps but improve daily comfort.
Expect a logical sequence: demolition and framing (including blocking), rough plumbing and electrical, waterproofing, tile and flooring, cabinetry and tops, glass, then fixtures and accessories. Patience with each step safeguards the finished result.
How to choose a contractor for aging-in-place results
Not every bathroom remodeler emphasizes universal design, so ask targeted questions and review the proposal carefully.
Questions that reveal expertise
- Curbless specifics: How will the subfloor be prepared, what drain type is planned, and how will water be contained?
- Waterproofing method: Which integrated system will be used and where does it begin and end?
- Blocking plan: Where will reinforcement go, and how is future hardware location documented?
- Slip resistance: Which floor tiles are proposed for the main area and shower pan, and why?
- Lighting and controls: How will ambient, task, and night lighting be layered, and where will switches be located?
What a thorough proposal includes
- Scope map: Drawings or renderings that show clearances, shower details, and storage.
- Selections list: Tile sizes, fixtures, finishes, and glass types identified by model or spec.
- Schedule outline: Milestones tied to ordering, demolition, tile work, and glass installation.
- Change-order process: How changes are requested, priced, and approved—before work proceeds.
Future adaptability without sacrificing style
Design the bathroom to evolve gracefully—so it never feels temporary or clinical.
- Invisible preparedness: Hidden blocking, leveled thresholds, and wiring for future upgrades you may choose later.
- Convertible vanity: A wall-hung vanity or furniture-style vanity with open space beneath can increase knee clearance if needed in the future.
- Flexible showering: A handheld spray on a slide bar, a comfortable bench, and simple controls work well for kids, guests, and any user with limited mobility.
- Consistent aesthetics: Choose designer-grade bars and valves that match your faucets and pulls, keeping the room cohesive.
Local mindset for Renton WA homes
Whether your home in Renton is newer construction or has classic bones, the same principles apply: clear pathways, curbless entries, layered lighting, reliable waterproofing, and storage that works at a comfortable height. Prioritize the elements you’ll feel every day—shower access, flooring traction, and lighting—and coordinate finishes so the room feels calm and timeless.
See a walk-in shower example
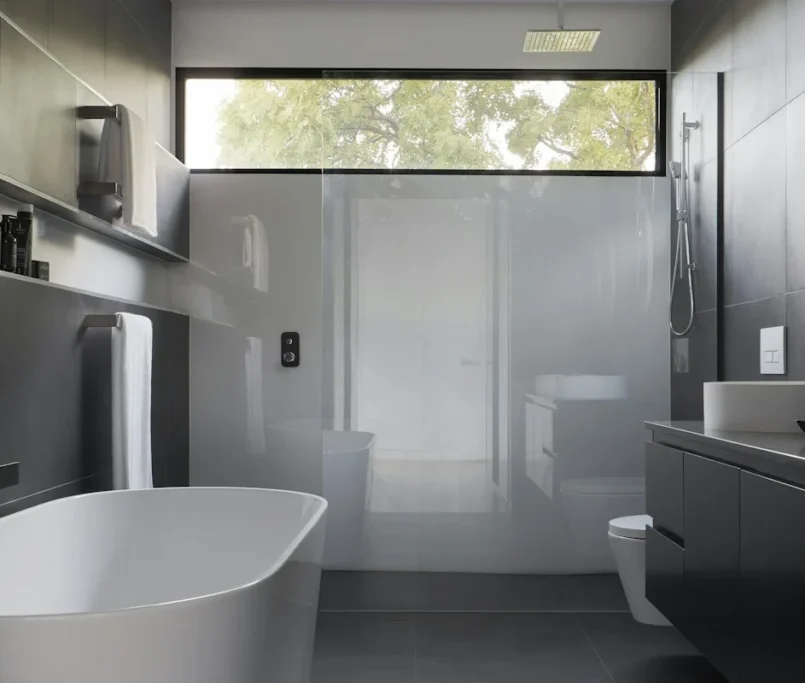
Want inspiration for a spacious walk-in shower and clean-lined finishes? Explore this Renton master bathroom walk-in shower for ideas on glass, layout, and tile transitions that keep water in the shower zone while maintaining an open feel.
Step-by-step planning checklist
- Define goals: Safer access now, with options to add support later.
- Measure and map: Note door widths, fixture locations, and potential pinch points.
- Choose the shower approach: Curbless with linear drain or center drain; bench location and glass style.
- Select slip-resistant flooring: Mosaic in the shower and complementary textured tile in the room.
- Plan reinforcement: Document backing locations at the shower, toilet, and potential entry support.
- Layer lighting: Overhead, task at the mirror, and night lighting along the floor or vanity toe kick.
- Dial in controls: Thermostatic valve, handheld on slide bar, lever faucets, comfort-height toilet.
- Organize storage: Drawer-based vanities, pull-outs, and niches at comfortable heights.
- Finalize selections early: Tile, fixtures, vanity, countertops, and glass to avoid delays.
- Confirm proposal details: Waterproofing system, tile layouts, blocking plan, and schedule milestones.
FAQs
Do I need a curbless shower for aging-in-place?
You don’t have to go curbless, but it’s the most seamless way to reduce tripping hazards and make entry easier. With the right slope and waterproofing, a curbless shower looks like a design upgrade while supporting changing mobility over time.
How wide should the bathroom door and pathways be?
Wider doors and generous pathways are easier for everyone, especially when carrying laundry or assisting a loved one. Aim for a layout that allows comfortable entry and turning space near the vanity, toilet, and shower—your remodeler can tailor exact dimensions to your home.
Can we add grab bars later if we reinforce the walls now?
Yes. Installing solid backing during the remodel lets you add or reposition grab bars down the road without opening finished tile or drywall. Many designer bars match common fixture finishes so they blend in with your style.
How long does an aging-in-place bathroom remodel take?
Timelines vary with scope, product lead times, and details like custom glass or intricate tile. Curbless preparation, waterproofing, and tile setting deserve careful, methodical work. A clear schedule and early selections help keep the project moving smoothly.
Ready to plan your Renton bathroom?
Our local remodeling team can help you define a precise scope, choose finishes that fit your style, and build the unseen details—like blocking and waterproofing—that make the space safe and comfortable for years. If you’re considering an aging-in-place bathroom remodel in Renton WA, reach out to discuss your goals and timeline. Contact us to start the conversation.
Planning a Renton Remodeling Project?
Discuss your goals, scope, and next steps with our local remodeling team.